


The first time I wrote about the Windows ICD tool here, there wasn’t much to look at. It wasn’t documented well (yet), and it was (is) in a constant state of change. (Although now it’s starting to stay fairly consistent.) With the latest versions, we have begun to see more functionality so that I will review this tool again. I would also like to point out that the HELP section has improved drastically, and Microsoft is documenting more and more about the tool.
The Windows Imaging and Configuration Designer (ICD) is previewing version 10.0.15021.1000 as part of the Windows 10 ADK Insider Preview Build 15021. You can download the ADK here if you are a member of the Windows Insider program.
Here is the link to “Provisioning Profiles” on Technet
Once you have installed the ADK, you can launch the Windows ICD tool.
If you are familiar with the 1607 version of the tool, you will be familiar with 3 of these sections:
(Unless otherwise stated, any content related to these three sections or the first three series of posts apply to the 1607 version.)
We will also notice a few new sections:
These all sound super interesting, so let's dig in and start seeing what they’re all about.
Today’s topic is going to be…
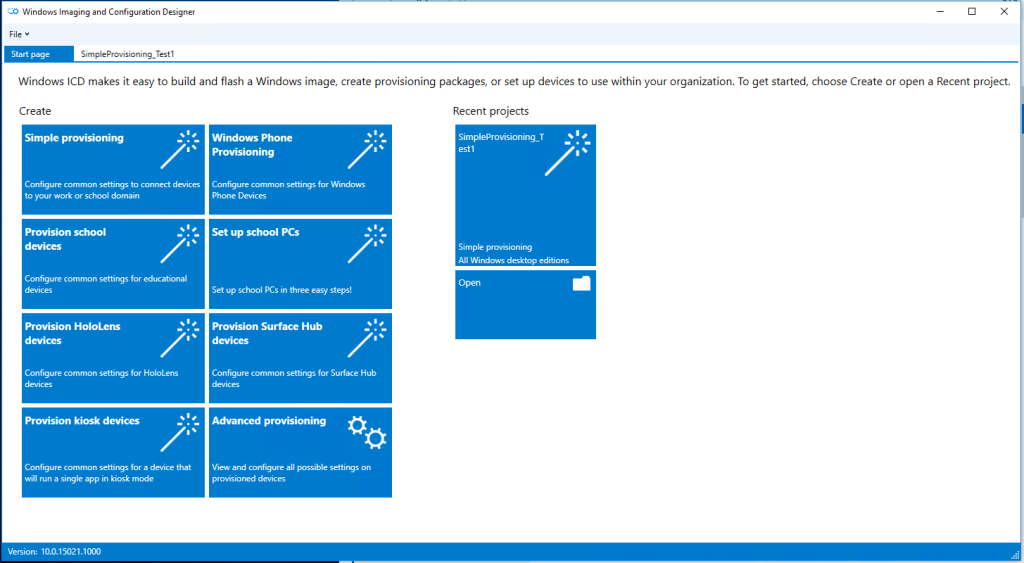
When we select Simple Provisioning, we are provided with a new and simple interface that allows you to start building your provisioning profile, as seen below.

The “Set up device” page of the simple interface allows us to define how we will name our computers and define a Product key if we would like.
The Device Name section is nice because it allows us to use several variables. Specifically %RAND% and %SERIAL%.
SERIAL – This will get the serial number from WMI and set that as the hostname.
You can combine this with a static string to get a dynamic device name.
E.g., ITS-LT-%SERIAL%
RAND – This will allow us to generate a random string of characters. We can define how many random characters we want generated by determining the number at the end.
E.g., %RAND:5% – This will generate five random characters
We can also use this to combine a static string to generate a dynamic device name.
E.g. ITS-LT-%RAND:5%
(I am not generally a fan of randomization. Although sometimes it has its time and place, I am not a fan. Random = Chaos.)
Here is an example of htocan using them to build a dynamic device name.
E.g. ITS-%RAND:2%-%SERIAL%
The Product Key section is pretty straightforward, specifically for folks who still need a KMS in place for Key management. You can give your Product key here, and it will apply it. Simple.
PRO TIP!
There is another lesser known feature that this section can assist with, and that is upgrading you SKU of Windows 10. For example changing from Windows Professional to Windows Enterprise without having to reload the operating system. This is actually feature of Windows 10, but this is a utility that allows us to simplify this process.
Watch the silent video below to see a demonstration of how to create a simple provisioning package and watch it upgrade a PC from Win 10 Pro to Enterprise in under 5 minutes.
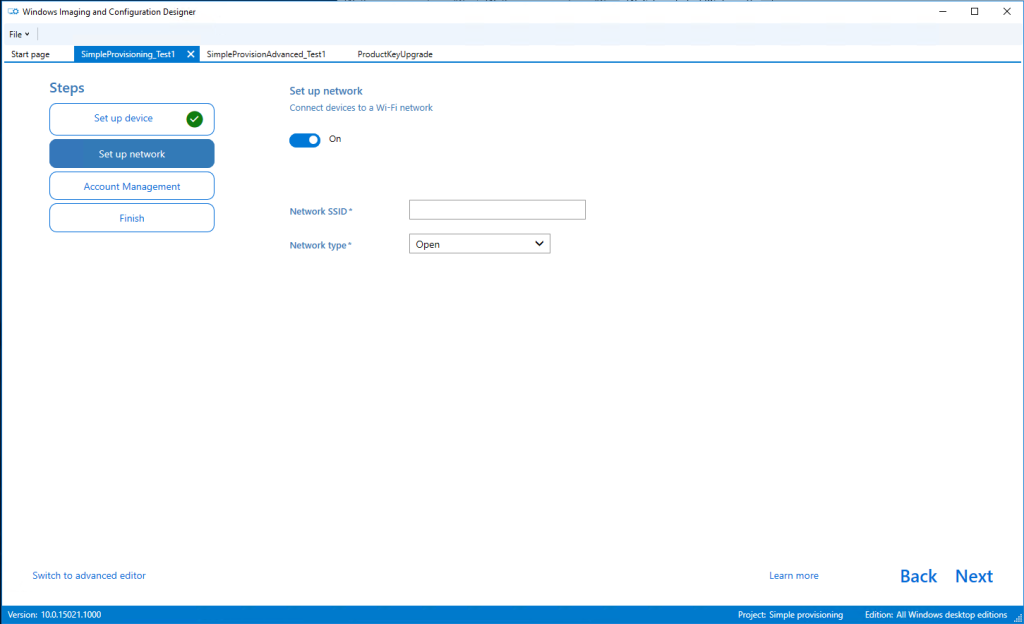
The “Set up network” page of the simple interface is very basic and allows us to connect to a basic wireless network using only Open or WPA2-Personal encryption. Otherwise, we must have our device connected to a LAN cable for network/internet communications configurations.
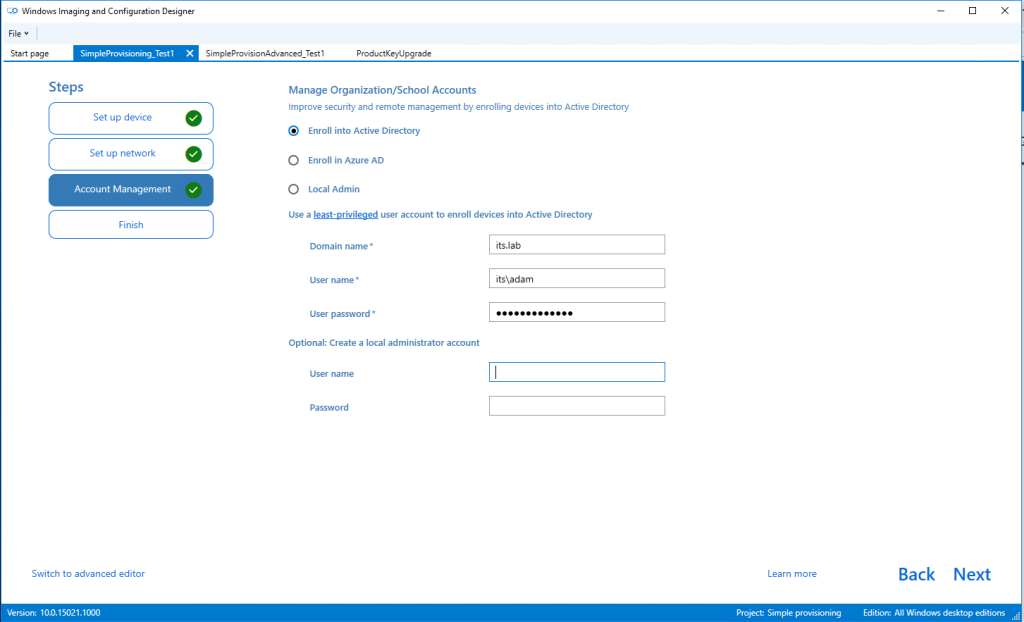
The “Account management” page lets us define how we want to manage our devices. It gives us the following options:
Enroll in Active Directory
This section allows us to enroll a device into a standard Active Directory environment by providing the Active Directory domain name and account credentials with the right to join the domain.
Enroll in Azure AD
This section allows us to enroll a device in Azure AD.

Note: I will cover Azure AD bulk enrollment in the post about Windows Phone Provisioning
Local Account
This section can be selected if you want to avoid joining a device to either AD or Azure AD. If you join your device to a form of AD, then defining a local account is still optional. You must create a local account if you decide not to join AD.
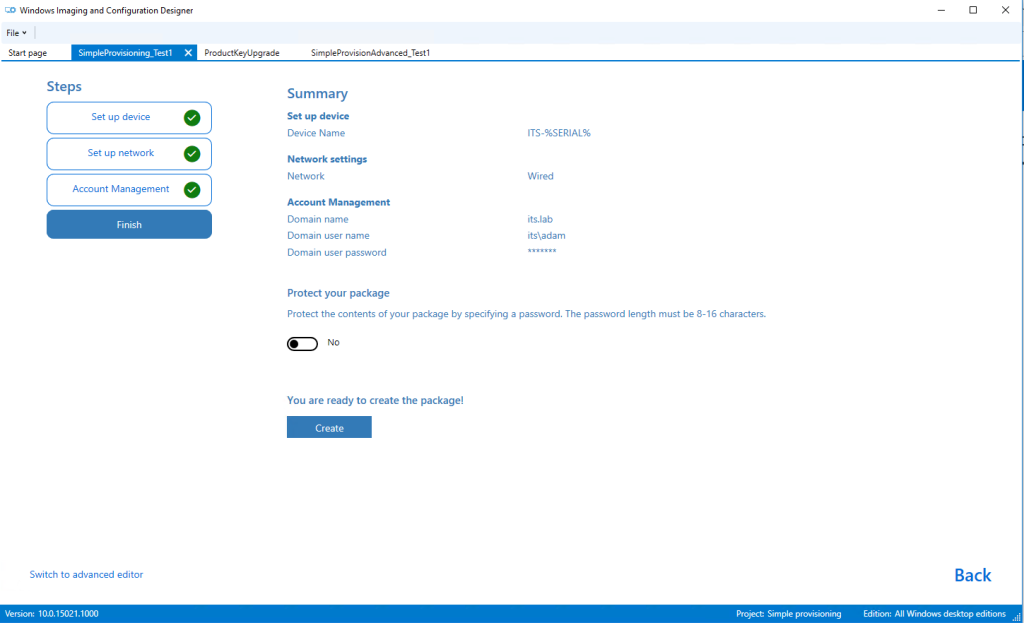
The “Finish” section of the simple interface allows you to review your details. After you have validated the settings, you can encrypt your provisioning package by providing a password of 8-16 characters. Finally, you can create your provisioning package.
When you select the “Create” button, the package will be created and automatically placed in the user's Documents directory.
You may have noticed the link in the bottom left of the simple interface in these screenshots that says, “Switch to the advanced editor.” If you are like me, you have to click that button. Well, when we do, we are prompted with a warning:
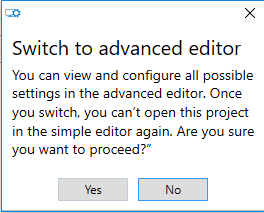
That means once we select the advanced view, we can never return to that “simple interface” wizard again for that specific configuration.
Once we are in the “Advanced Editor,” we will see the screen that we are used to seeing the Windows ICD tool.
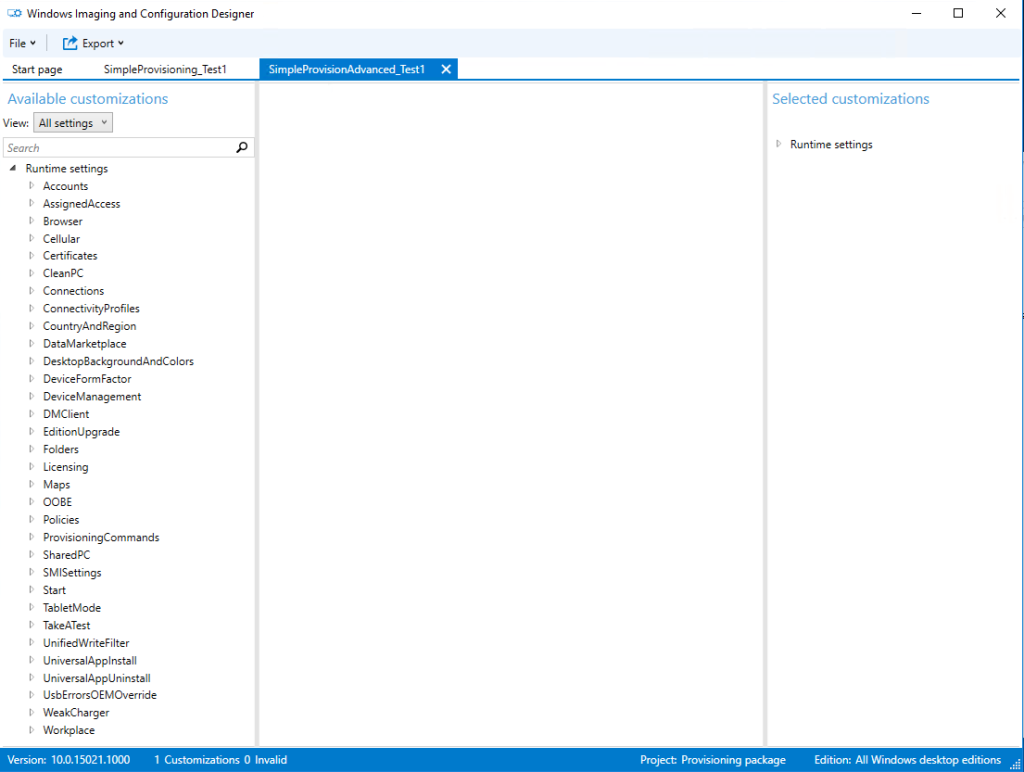
Here, we see the same familiar settings from the previous versions of the Windows ICD tool.
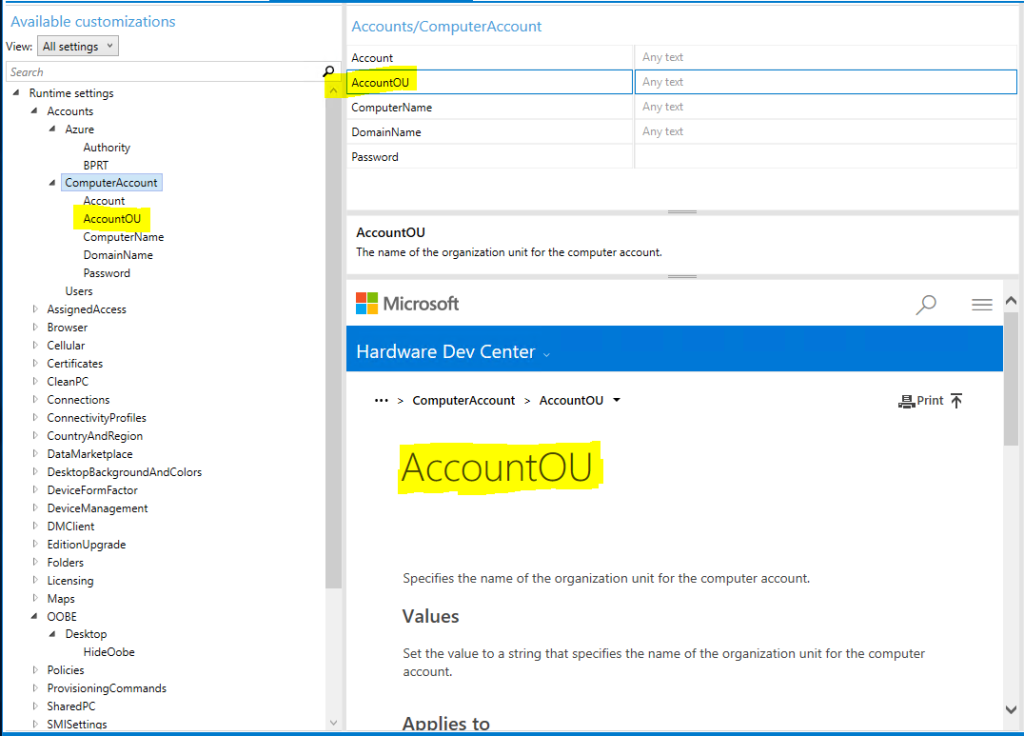
I specifically wanted to point out how well Microsoft has provided us with HELP content directly in the tool.
That’s not to say there aren’t still sections that need work…
What happens if we take the Provisioning profile we created in the simple interface and open it in the Advanced view?
Watch this short (and silent) video to see what happens.
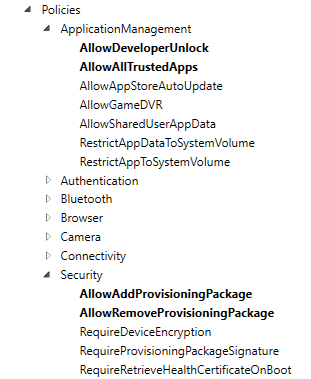
One thing to note about these “template” Preference profiles is that there are quite a few settings “pre” configured, which we can see if we dig through the Advanced editor. (I will also show some tricks for seeing what settings are applied in the preference profile below.)
The image below shows an example of some settings that get applied as part of the template.
Let's look at some files created as part of our Provisioning Profile. Like many things, a good amount of the configuration data is stored in XML. Who doesn’t love XML? I certainly do.
If we open the directory, our project is saved, too; we will see a similar file structure as the one shown below:
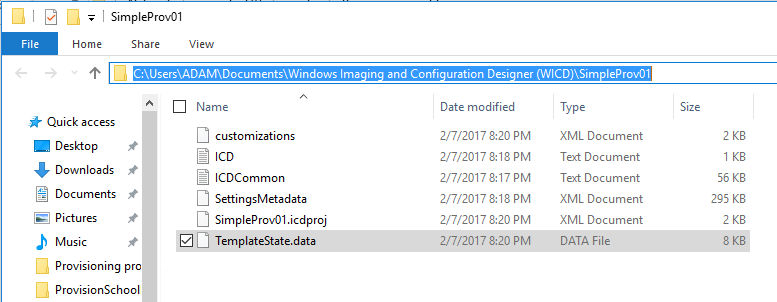
If we look inside here, we see XML and TXT files. I can work with both things because they’re usually written in “clear text.” So, let's take a look at some of these files.
Looking at the ICD.txt and ICDCommon.txt files, I found log or dump files containing details about the provision profiles. Nothing seems too useful, but it's good to know. Below is a snippet from the ICD.txt file.

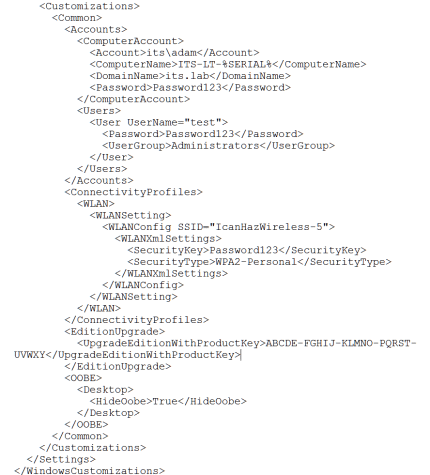
Let's look at some of these XML files, starting with the Customizations.xml file. This file seems promising. This file contains all of the details we inputted into the UI.
That doesn’t seem to be enough info, however. Where is all the pre-configured data? Does it have to be stored somewhere? Let’s keep looking.
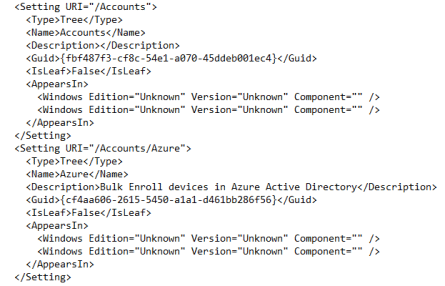
Next, we have the SettingsMetadata.xml file. The name alone makes me think this will be system data, and the file is correct. It is an XML file with approximately 7,000 lines of data. It is an XML config file with details about the potential settings available to a provisioning profile. I am still trying to find more information about this file, and when I do, I will update this section. For now, I will provide a quick example of the file, and we will look at the next file.
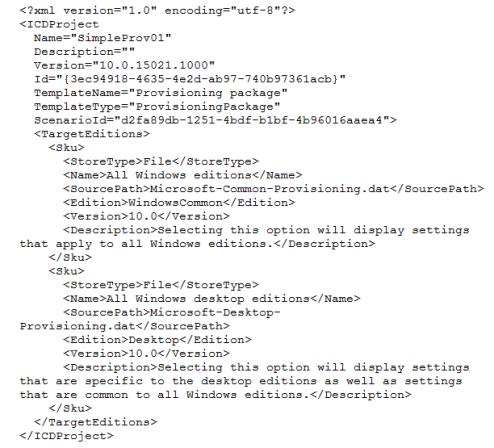
The next file we will look at is the .icdproj.xml file that gets created with every project. In the case of this example, our file is named SimpleProv.icdproj.xml. This file doesn’t seem to contain a lot. It doesn’t contain any data for provisioning a Windows device. This file appears to be a configuration file for the profile project to help determine its type of provision profile. Below is an example of the file:
That leaves us one file to see if the data is stored. This file is called TemplateState.data. The file extension .data is not a file extension I have ever seen. I don’t know what you all do with files that have strange file extensions, but I try to open them with Notepad. Sometimes, that works out better than others. In this case, it was a success. If we open this file, we find XML. Fantastic! I think I mentioned that I like XML. Looking through this file seems promising. This looks like just the data I was looking for. All of it, too, in one nice little unmarked bundle. This file appears to contain two sections. The first section is the section we are interested in, the data. The second section is template metadata. Below, you will see a screenshot containing the data section, and we will see all the different sections defined in the Simple Provisioning profile. It seems it is broken into sections that align with what we saw in the simple interface.
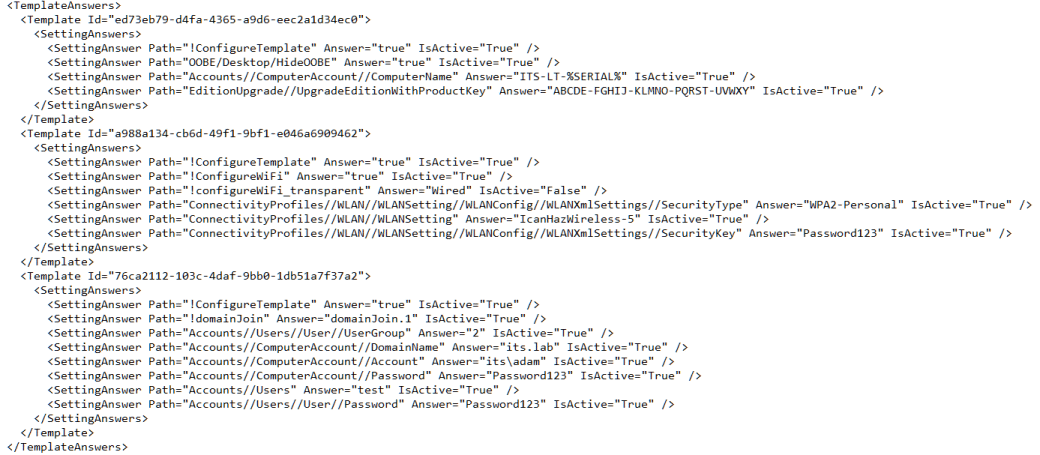
IMPORTANT: This file contains clear text passwords for the wifi profile, the local admin account, and the account used to join the domain!
So there we have it—a simple provisioning profile. We created a basic package from a profile to upgrade our Windows SKU and looked inside the XML of provisioning profiles.
In our next post, we’ll review the Provisioning School Devices profile preference and dig into those settings.


6026 Kalamazoo AVE SE, #272
Kentwood, MI 49508
Contact us at (616) 242-5300
